
How do I activate the 3-position switch on the InterLink?
Resolution
To take advantage of the 3-position switch, first download the latest version of RealFlight G2. For information on how to do so, see Q01-1011: How can I download the latest version of RealFlight G2?
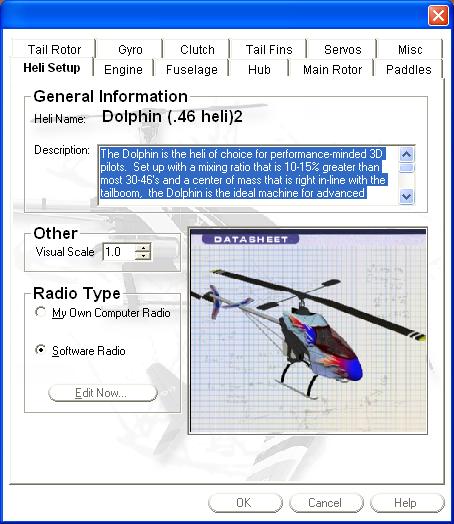
Programming a helicopter to take advantage of the three-position switch requires that you first make a copy of the respective heli. To do so, highlight the desired model and click on the 'Make a Copy' button. Follow the onscreen instructions and rename your model accordingly. Next, click the 'Edit' button.
This will bring up the screen below. In the 'Radio Type' dialog box, click the "Edit Now…" button.
After clicking on the 'Edit Now…' button, the following window will appear. It is in this window that you will determine which switch, switch position, or key, etc. controls the various flight modes and so forth.
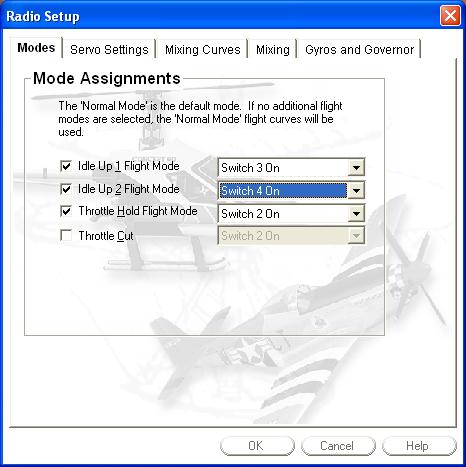
To adjust the switch, switch position, etc. click the indication box to the right of the respective Flight Mode. This will bring up the dropdown menu selections with the available options. For example, if you wish to set the "Idle Up 1 Flight Mode" click on the box to the right of 'Idle Up 1 Flight Mode'. To control the 'Idle Up 1 Flight Mode' using the 3-Position switch at the middle position, set it to "Switch 3 On" or "3 Pos Mid." Both options appear in the dropdown menu and have the same effect on the program.
Additionally, if you wish to use the down, or closest switch position towards you for the "Idle Up 2 Flight Mode", simply click in the appropriate box and alter the switch to either "Switch 4 On" or "3 Pos Down" as indicated in the following screens.
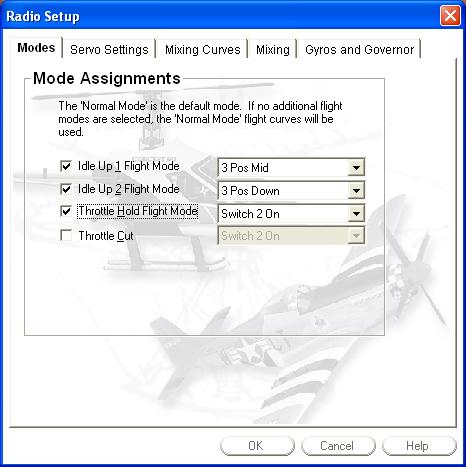
The reason that Switch 3 and 4 are still an option in the dropdown menus is to allow for the backwards compatibility with aircraft that have been customized with previous versions of the RealFlight software. It is suggested that you use the 3 Pos up, mid, down with the InterLink to guarantee that it will work with future versions of RealFlight.